How to delete a Facebook account
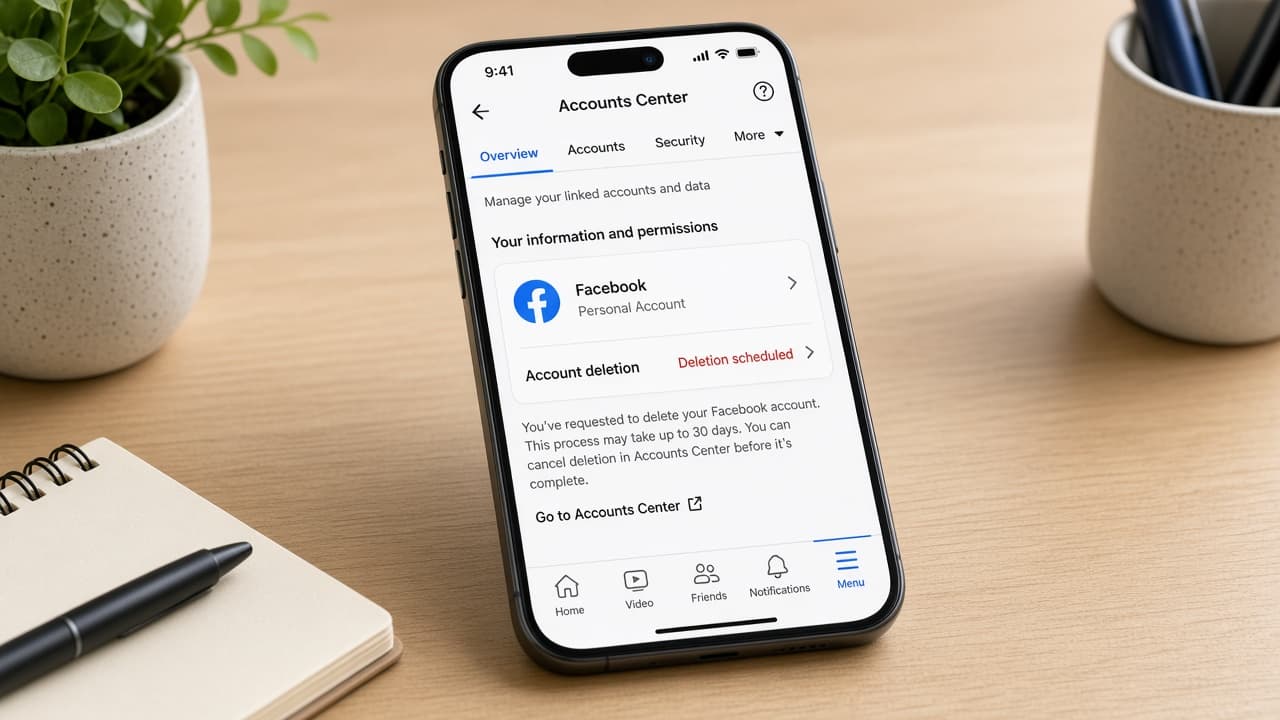
Permanently delete Facebook through Meta Accounts Center after you download your information, choose Delete account and stay logged out through the cancellation period.
Deleting Facebook removes your profile from the social graph after a short delay. Meta manages the request in Accounts Center (or Meta Account settings as that rollout continues). Friends may still keep copies of messages you sent them even after your account is gone.
Deactivate hides you temporarily. Delete starts a process you can usually cancel by logging in again within about 30 days. After that window, Meta treats the account as permanently deleted. Some residual logs may remain without your personal identifiers.
Download your information first from Facebook settings or Accounts Center. Include photos, posts and anything you might need for records. If you use Facebook to sign into Meta Quest or other Meta products, deleting Facebook can remove access to those services too.
Marketplace listings, Pages you solely admin and ad accounts can be affected. Transfer admin roles or download business assets before you confirm deletion. Menu names can shift after app updates, so match the path by meaning when wording differs.
Step-by-step guide
Time: 30 to 60 minutes including a full information download
What you need
- Facebook app or Facebook.com
- Working Facebook login
- Computer or phone storage for your download
- List of Pages, groups and apps that use Facebook Login
Before you start
- Logging in during the cancellation window can cancel deletion.
- Messages you already sent may still appear in friends' inboxes.
- Deleting Facebook can affect Meta Quest and other Meta logins.
- Only use official Facebook or Accounts Center download tools.
Step 01
Inventory what Facebook holds for you
List photos, events, marketplace history and logins that depend on this account before you start deletion.
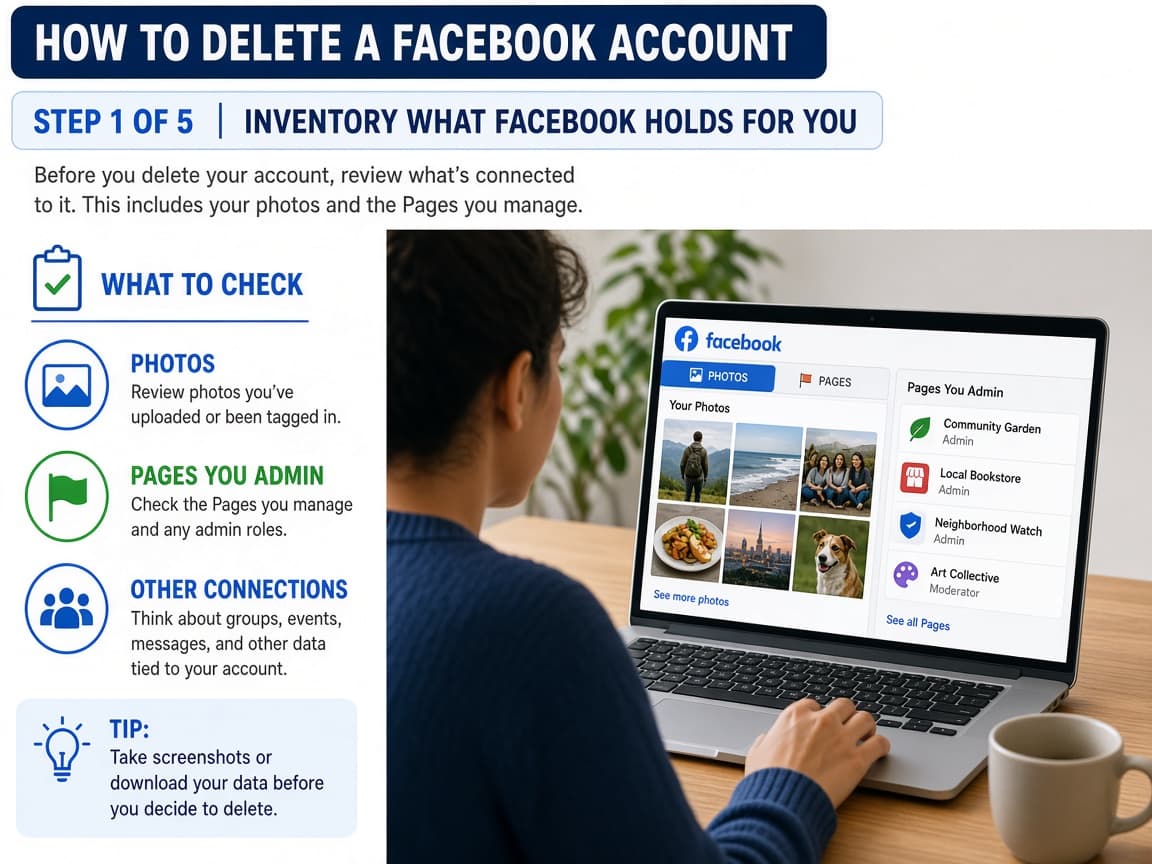
Know what you will lose once deletion completes. Do this step in order
1a
Separate deactivate from delete
Deactivate pauses the profile. Delete schedules permanent removal after the delay. Choose Delete only when you are finished with the account.
1b
List Pages, groups and Quest logins
Write down Pages you admin, groups you solely manage and any Meta Quest or VR services tied to Facebook. Plan handoffs or alternate emails.
1c
Check Marketplace and payment methods
Cancel open sales, remove payment methods you no longer want stored and screenshot order history you may need for taxes or disputes.
Step 02
Download Your Information from Facebook
Use Facebook's official download tools so you keep a copy of posts, photos and profile data.
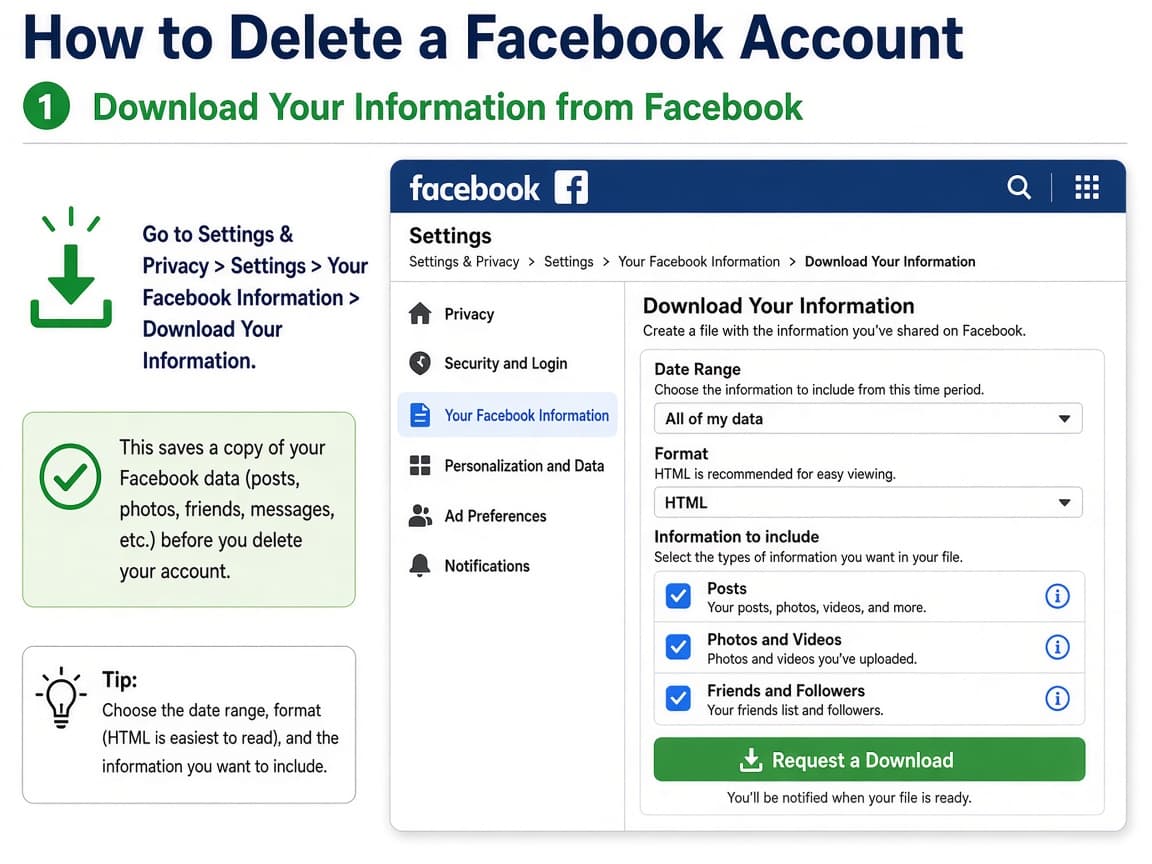
Official archives come from Facebook or Accounts Center, never random websites. Do this step in order
2a
Open Settings and privacy
On Facebook.com click your profile picture, then Settings and privacy, then Settings. In the app, open the menu and Settings and privacy.
2b
Start Download Your Information or Accounts Center export
Look for Your information, Download your information or Accounts Center information tools. Request a full copy or the categories you care about most.
2c
Wait for the email or notification
Large accounts take time. When Facebook notifies you, download the file promptly and extract it to confirm media files open.
2d
Save the archive outside Facebook
Store the zip on a drive or computer folder that does not depend on this Facebook login.
Step 03
Request deletion in Accounts Center
Follow Meta's Accounts Center path to Delete account for your Facebook profile and complete every confirmation screen.
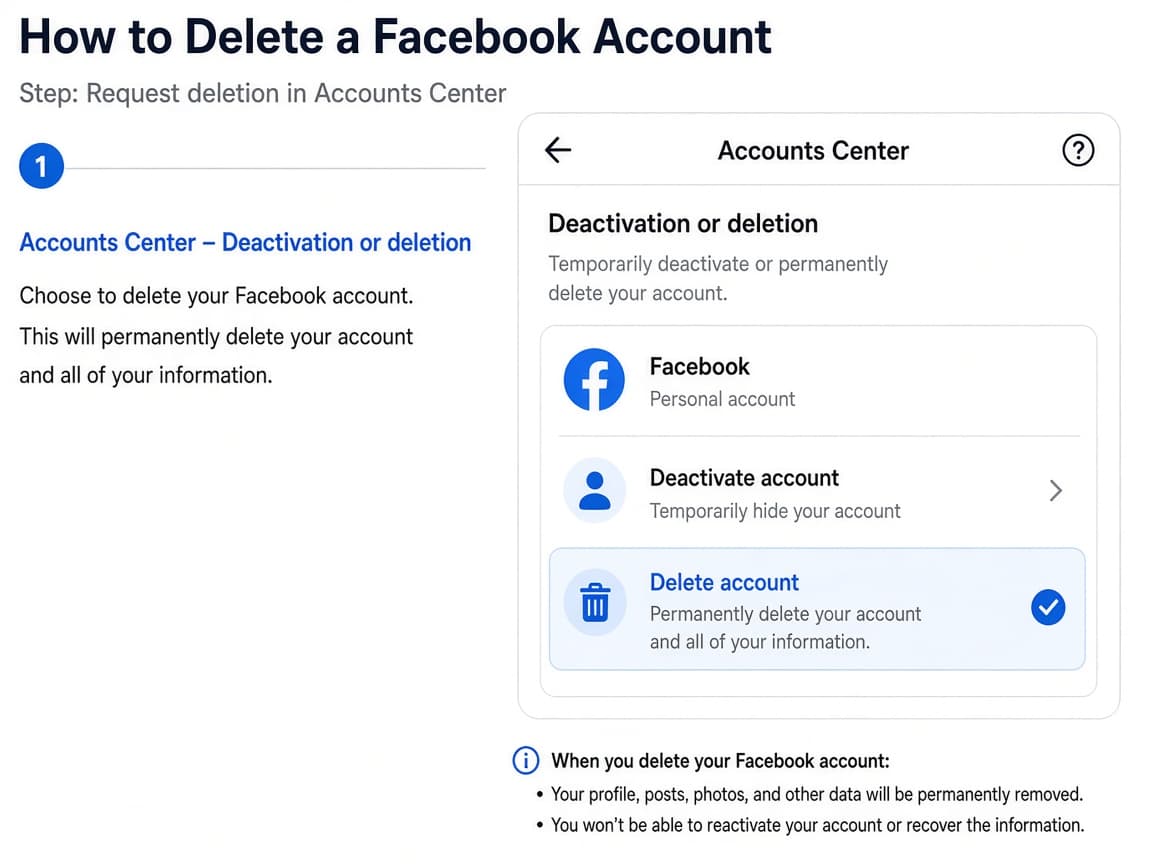
Account ownership and control is where Delete account lives. Do this step in order
3a
Open Accounts Center from Settings
In Settings, click or tap Accounts Center (or Meta Account). If you see Manage accounts, use that entry point instead.
3b
Open Personal details then ownership controls
Choose Personal details, then Account ownership and control, then Deactivation or deletion. Select the Facebook account or profile to remove.
3c
Select Delete account and Continue
Choose Delete account rather than Deactivate. Tap or click Continue and enter your password when asked.
3d
Confirm until Facebook acknowledges the request
Finish every prompt. You should see a message that deletion is scheduled or that you can cancel by logging in again within the stated period.
Step 04
Protect the waiting period and update leftover logins
Stay signed out, watch for accidental logins on other devices and migrate apps that still rely on Facebook Login.
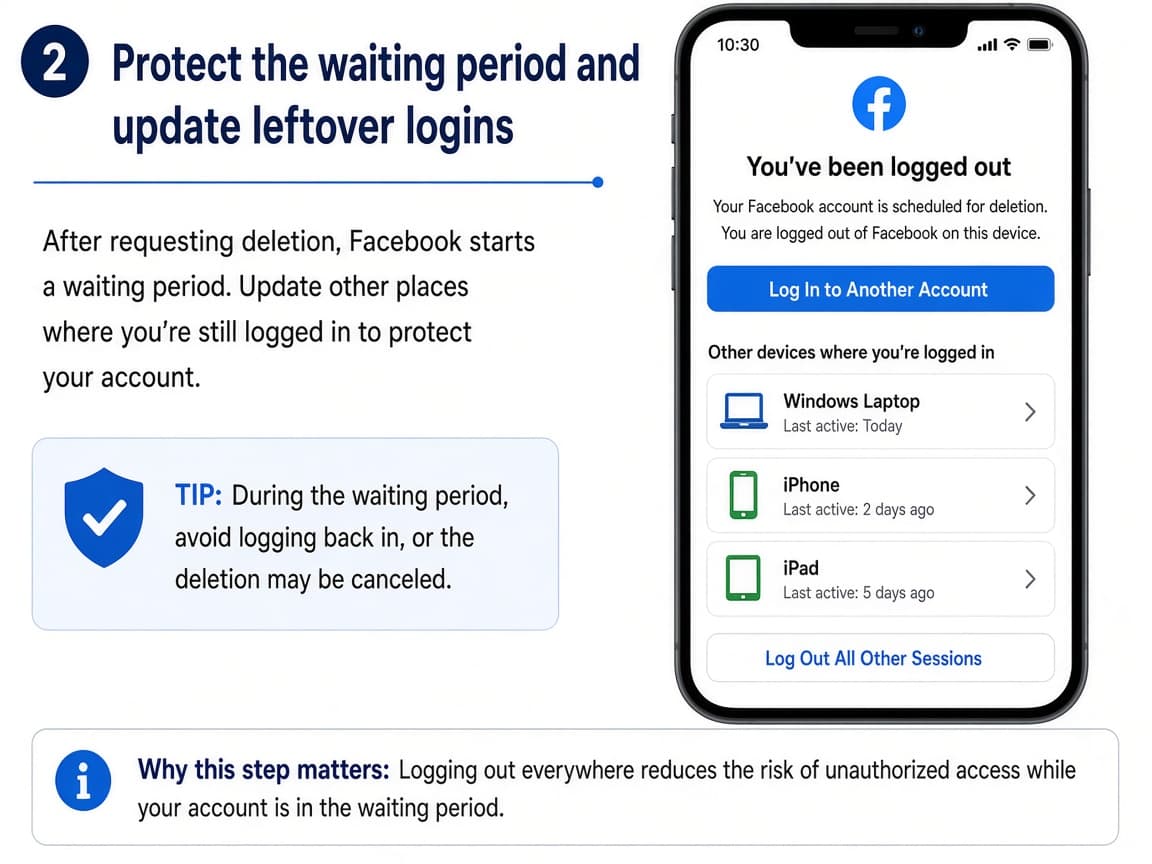
Other devices can cancel deletion if they auto-sign you back in. Do this step in order
4a
Log out everywhere you can
Sign out of Facebook on phones, tablets and browsers. Review Where you're logged in if the option still appears and end stray sessions before they cancel deletion.
4b
Switch Facebook Login on other sites
Visit important sites that used Continue with Facebook and add email password sign-in while you still can.
4c
Plan how friends will reach you
Share an email, phone number or other social handle so people are not stuck messaging a deleted profile.
Done when
- Download Your Information archive and verify it opens
- Transfer Page or ad account roles you still need
- Note apps that use Facebook Login
- Reach Deactivation or deletion in Accounts Center
- Choose Delete account and finish confirmation
- Remain logged out through the waiting period
Eagle Frame's takeaway: export your Facebook information, open Settings then Accounts Center, go to Personal details and Account ownership and control, choose Deactivation or deletion, select Delete account and confirm. Stay logged out through the cancellation window if you want the deletion to finish.