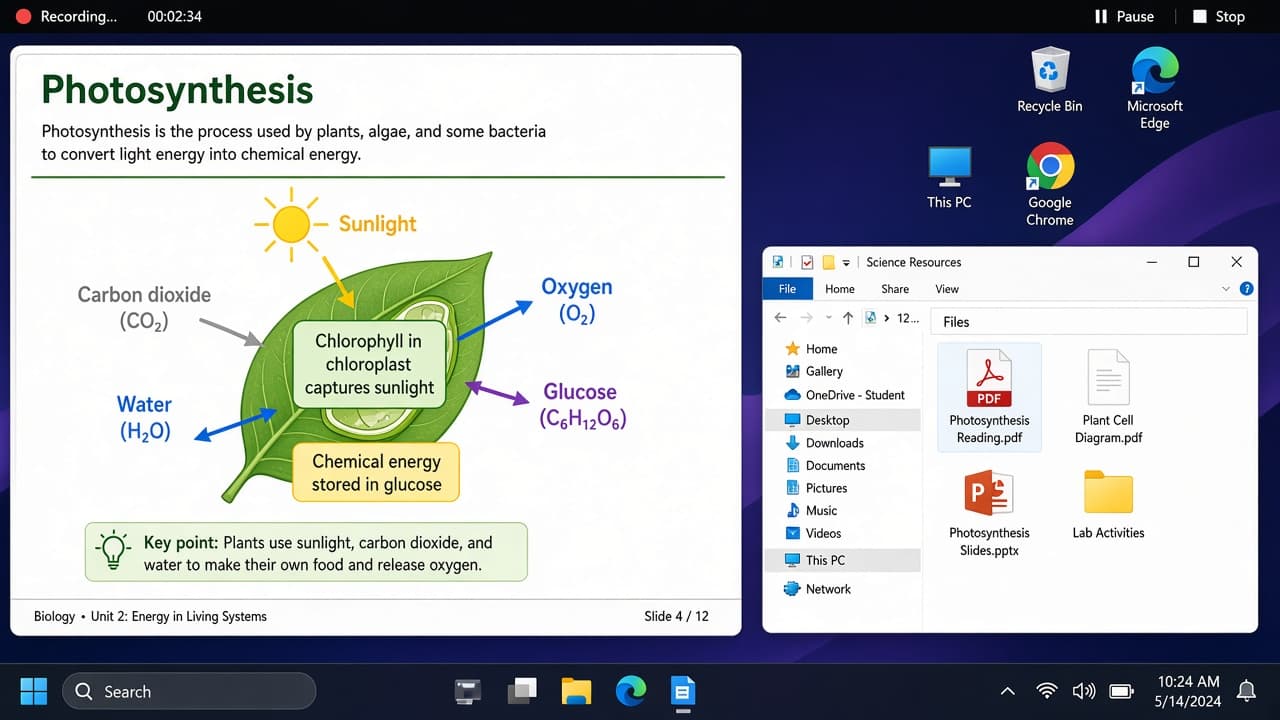
How to screen record on a computer
Record your screen on Windows with Snipping Tool or Xbox Game Bar. On a Mac use the screenshot toolbar, then find the video file and trim before you share.
A screen recording is a video of what happens on your display. It is the right tool when a still screenshot cannot show a sequence: clicking through settings, reproducing a bug or walking someone through a form. Windows and macOS both include built-in recorders, so most people can start without installing extra software.
On Windows 11, Snipping Tool can record a selected area. Press Windows logo key + Shift + R, draw the region, then start. Files usually land in Videos > Screen recordings. Xbox Game Bar (Windows + G or Windows + Alt + R) is better for capturing one active app window, including many games. It saves under Videos > Captures. Game Bar generally cannot record the desktop or File Explorer itself.
On a Mac, press Shift-Command-5 to open the screenshot toolbar. Choose Record Entire Screen or Record Selected Portion, set Options for microphone and save location, then start. Stop from the menu bar stop control. The video appears as a thumbnail, then saves where Options pointed (often the desktop).
Microphone audio is optional on both platforms. Turn it on when you want a voiceover. System sound support differs by tool and OS version, so do a ten-second test before a long demo. Close private windows, mute unrelated notifications and know where the file saves before you promise a link.
Step-by-step guide
Time: 10 to 20 minutes including a short practice clip
What you need
- Windows 10/11 PC or a Mac with recent macOS
- Built-in recorder (Snipping Tool, Xbox Game Bar or Shift-Command-5 toolbar)
- Microphone if you want narration
- Enough free disk space for video files
Before you start
- Screen recordings can capture passwords, messages and notification banners. Close private windows before you start.
- Xbox Game Bar records an active app window. It is a poor fit for the Windows desktop or File Explorer.
- Long recordings create large files. Stop when you have what you need and delete failed takes.
Step 01
Record a region on Windows with Snipping Tool
Use this when you need part of the screen rather than one full app window.
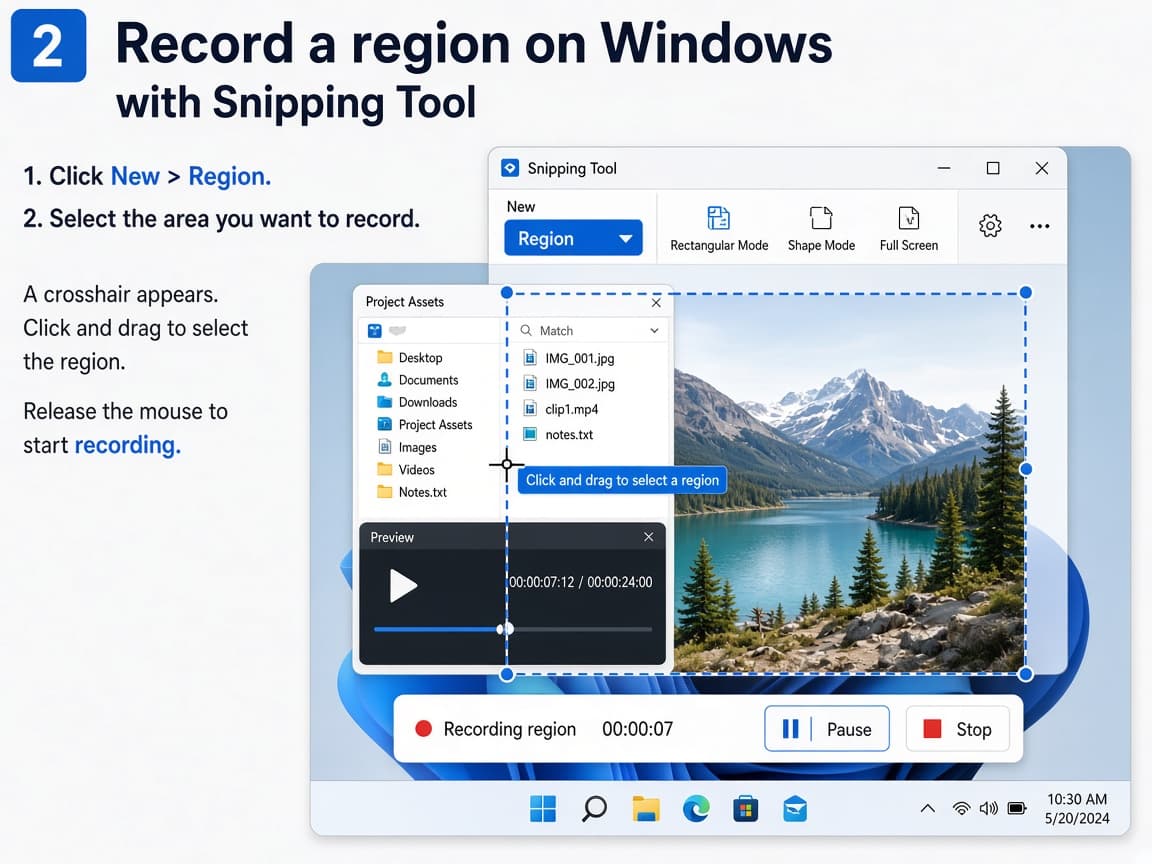
Windows + Shift + R opens a video snip overlay on supported Windows builds. Do this step in order
1a
Press Windows logo key, Shift and R
Hold Windows and Shift, then press R. The screen dims and you can select the area to record. You can also open Snipping Tool from Start, choose Record, then New.
1b
Draw the region and review mic settings
Drag to select the area. Toggle the microphone if you want voiceover. Leave it off for a silent demo of on-screen steps only.
1c
Select Start, perform the steps, then Stop
Click Start, wait for any countdown, then do the actions you want on camera. Click Stop when finished. Open the saved clip from the notification or from Videos > Screen recordings.
1d
Confirm the MP4 in Videos > Screen recordings
Open File Explorer to Videos, then Screen recordings (wording may say Screen Recordings). Play the file once. If the folder is empty, check whether you stopped the recording and whether OneDrive redirects Videos.
Step 02
Record an app window with Xbox Game Bar
Game Bar is built for capturing the focused application, including many games and browsers.
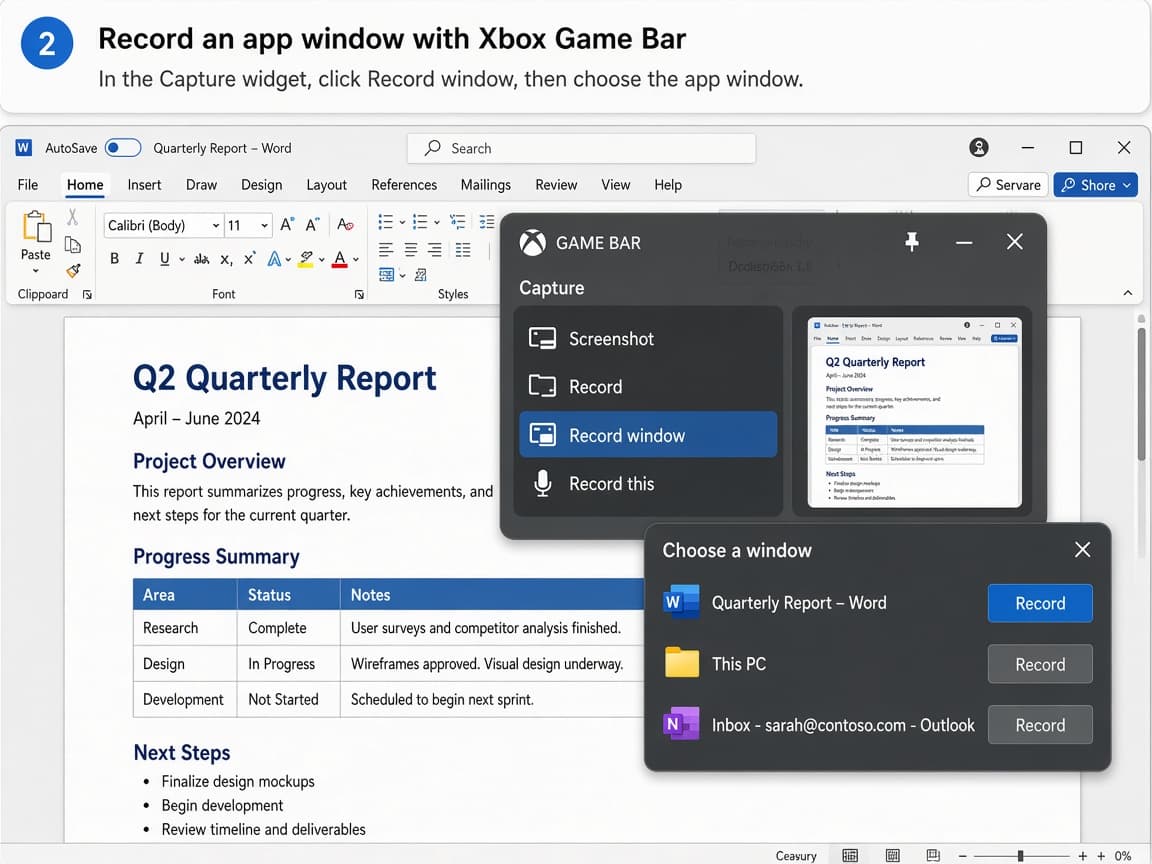
Windows + G opens Game Bar; Windows + Alt + R starts or stops capture. Do this step in order
2a
Focus the app you want, then press Windows + G
Click inside the target app so it is active. Press Windows logo key + G. If nothing appears, enable Xbox Game Bar under Settings > Gaming.
2b
Start with the Capture widget or Windows + Alt + R
In the Capture widget, click the record button or press Windows + Alt + R to start immediately. A small timer usually appears. Do your demo inside that same app window.
2c
Stop recording and open Videos > Captures
Press Windows + Alt + R again or use the stop control. Open Videos > Captures to find the MP4. Use See my captures in Game Bar if you prefer the built-in gallery.
Step 03
Record on a Mac with Shift-Command-5
The macOS screenshot toolbar handles full-screen and selected-portion video without a separate app.
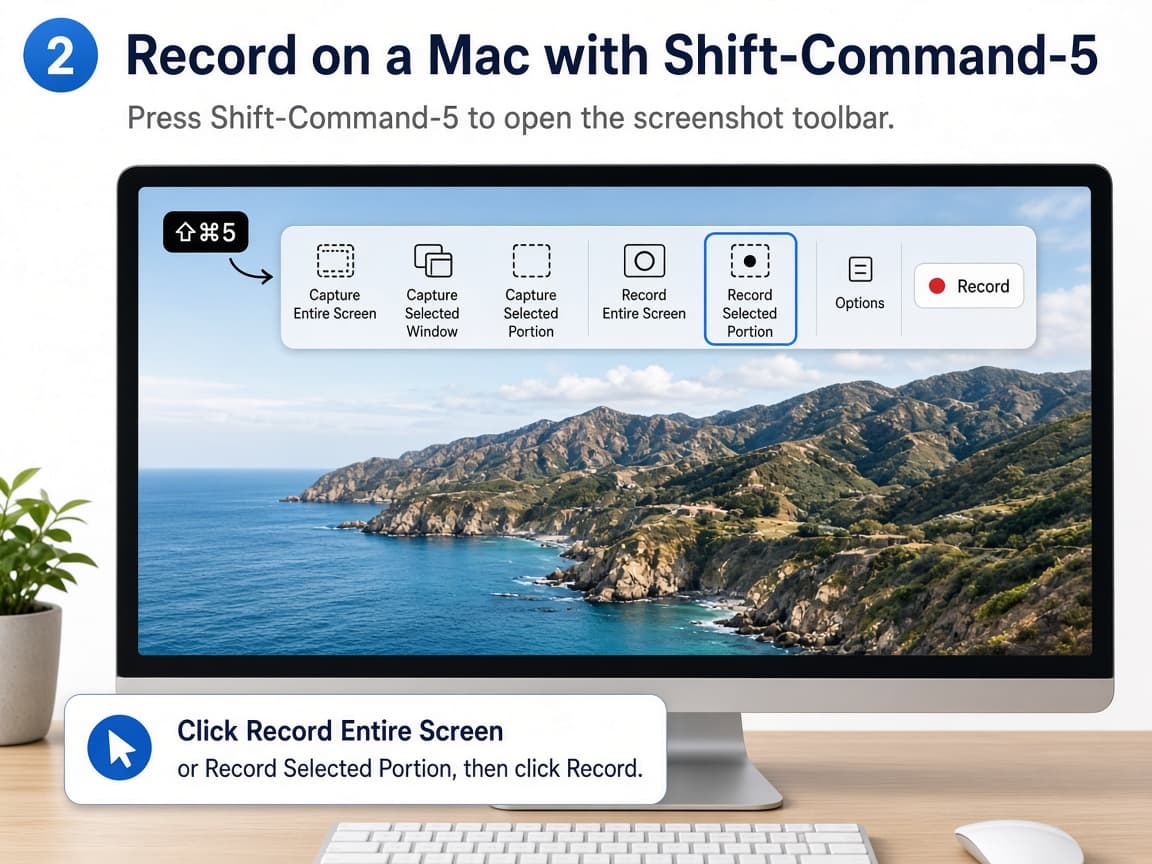
Shift-Command-5 opens capture and record controls in one place. Do this step in order
3a
Press Shift, Command and 5 together
Hold Shift and Command, then press 5. The toolbar appears along the bottom of the screen with still and video options.
3b
Choose entire screen or selected portion, then set Options
Click Record Entire Screen or Record Selected Portion. Open Options to pick save location, timer and microphone. Built-in system audio usually needs extra software on Mac; mic narration is the simple path.
3c
Start, stop from the menu bar, then check the file
Click Record. For a selection, drag the area first if prompted. Stop with the menu bar stop button (or Command-Control-Esc on many versions). Open the thumbnail or the save folder to confirm the clip.
3d
Trim in QuickTime if the ends are messy
Open the movie in QuickTime Player, choose Edit > Trim, drag the handles and save. Cutting the countdown and the fumble at the end makes the clip easier to watch.
Step 04
Test audio, length and privacy before you share
A thirty-second rehearsal catches almost every recording mistake.
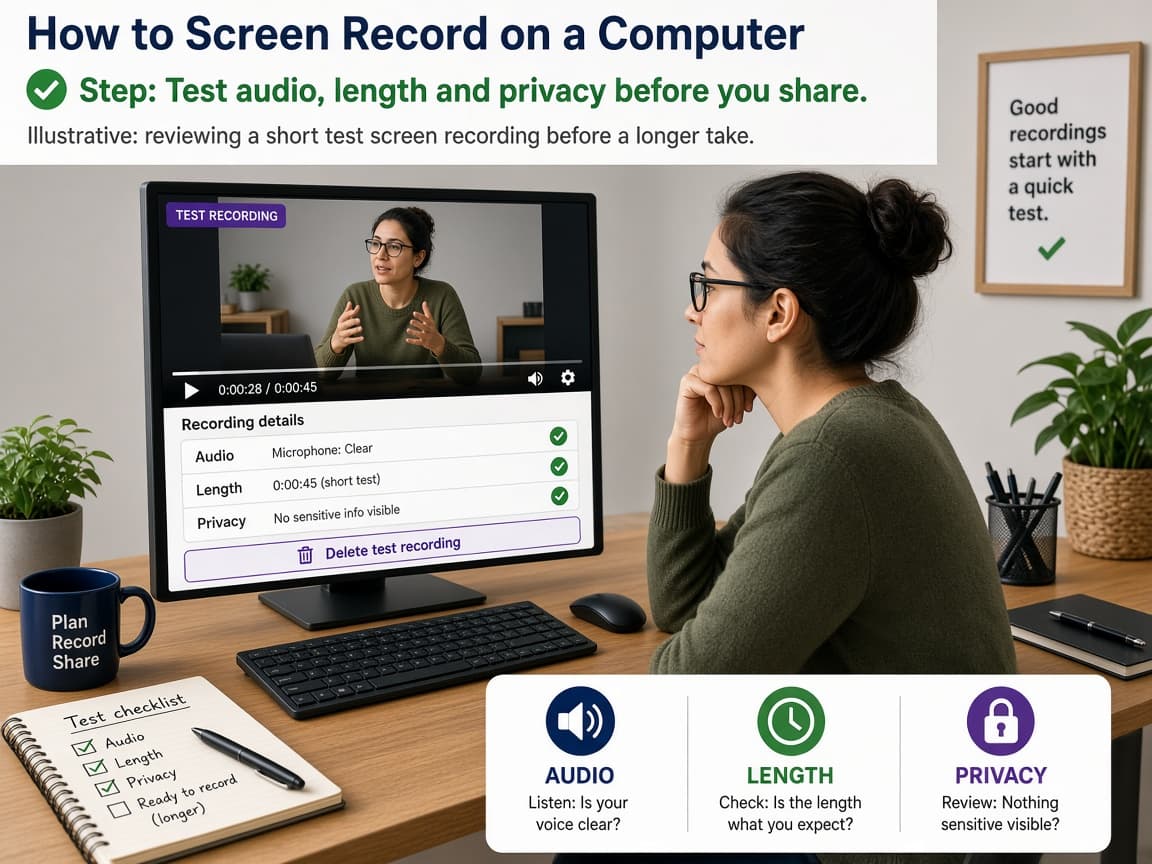
Always watch a short test before a long demo. Do this step in order
4a
Record ten seconds with the mic setting you plan to use
Speak a test sentence if narration matters. Play it back. Fix muted mic, wrong input device or clipping before you record the real walkthrough.
4b
Hide sensitive windows and pause notifications
Close mail, chat and password managers. On Windows, focus assist or Do not disturb helps. On a Mac, turn on Do Not Disturb. Common mistake: a private Slack toast in the middle of a shared clip.
4c
Keep clips short and delete bad takes
Aim for the shortest video that shows the steps. Delete failed recordings so they do not fill the disk or get sent by accident.
Done when
- Private windows closed
- Recorder shortcut or toolbar opened
- Microphone on or off on purpose
- Short test recording completed
- Save folder confirmed (Videos or desktop)
Eagle Frame’s takeaway: pick Snipping Tool (Windows + Shift + R) for a custom Windows region, Game Bar (Windows + Alt + R) for one app window and Shift-Command-5 on a Mac for full screen or a selection. Record a short test, confirm the folder under Videos or your Mac Options path, then trim before you send.