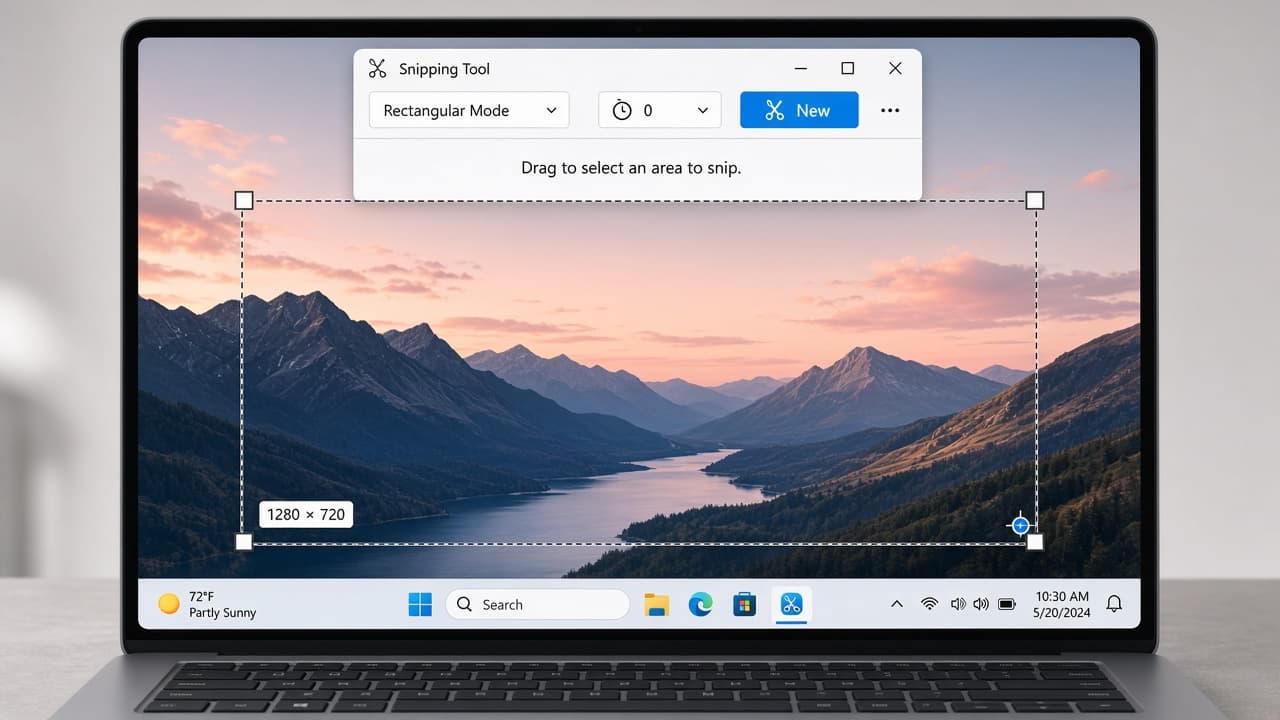
How to take a screenshot on Windows
Capture the full screen, a single window or a custom area with Snipping Tool and Print Screen shortcuts, then find the file in Pictures or paste from the clipboard.
A Windows screenshot is a still image of what is on your display. You can grab the whole screen, one window or a rectangle you draw yourself. Current Windows 10 and Windows 11 builds include Snipping Tool and keyboard shortcuts, so you do not need a separate app for everyday captures.
The shortcut most people should learn first is Windows logo key + Shift + S. It opens the snipping overlay so you can choose a rectangular area, freeform shape, window or full screen. The capture goes to the clipboard. A notification usually appears so you can open the image in Snipping Tool to mark it up and save a file.
Windows logo key + PrtScn (Print Screen) still matters when you want an automatic file. It captures the full screen and saves a PNG under Pictures > Screenshots (or OneDrive Pictures > Screenshots if that folder is redirected). Alt + PrtScn copies only the active window to the clipboard. On many Windows 11 PCs, pressing PrtScn alone now opens the same snipping overlay instead of copying silently.
Know where the image lands before you promise someone a file. Clipboard-only captures vanish if you copy something else next. Auto-saved full-screen shots live in the Screenshots folder. Open File Explorer, go to Pictures, then Screenshots and sort by Date modified if the folder is crowded.
Step-by-step guide
Time: 5 to 15 minutes to learn the main shortcuts and find your save folder
What you need
- Windows 10 or Windows 11 PC
- Keyboard with Windows logo key and Print Screen (PrtScn)
- Snipping Tool (built in)
- File Explorer access to Pictures
Before you start
- Screenshots can include private messages, passwords visible on screen and notification banners. Check the image before you share it.
- Windows + Shift + S copies to the clipboard. It does not always create a permanent file until you open the notification and save.
- On multi-monitor setups, full-screen shortcuts may include more than one display. Review the file before sending.
Step 01
Capture a custom area with Snipping Tool
Use the overlay when you only need part of the screen. It is the fastest everyday method on current Windows.
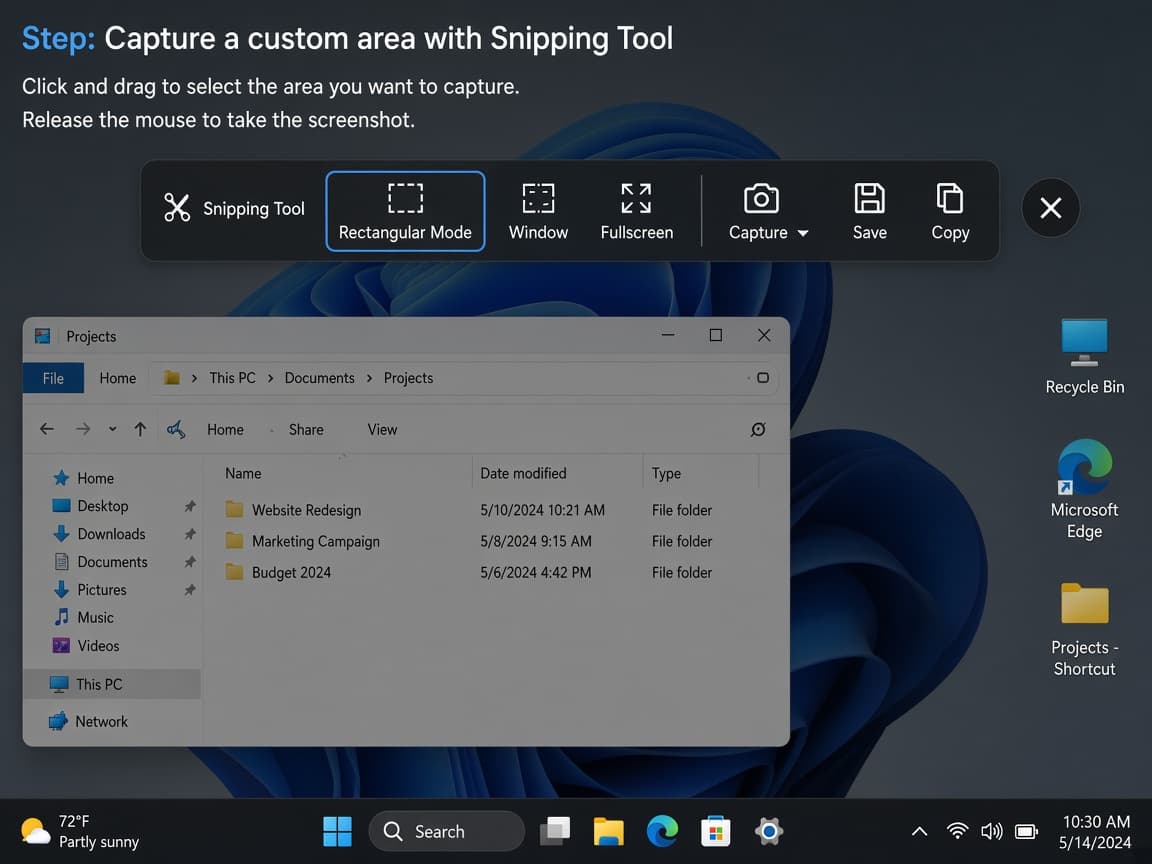
Windows + Shift + S opens the snipping overlay without searching Start first. Do this step in order
1a
Press Windows logo key, Shift and S together
Hold the Windows logo key and Shift, then press S. The screen dims and a small toolbar appears at the top. You are in snip mode.
1b
Choose rectangular, freeform, window or full-screen mode
Pick Rectangular Snip for most work. Freeform draws an irregular shape. Window Snip highlights one app window. Full-screen Snip grabs everything visible.
1c
Drag or click to capture, then watch the notification
For a rectangle, click and drag across the area you want, then release. A toast notification usually appears in the corner. Click it to open Snipping Tool for markup and Save.
1d
Paste from the clipboard when you only need a quick share
After a snip, press Ctrl + V in an email, chat or document. Common mistake: copying something else before you paste, which replaces the screenshot on the clipboard.
Step 02
Save a full-screen file with Windows + PrtScn
This shortcut writes a PNG for you. Use it when you want a complete record of the desktop without opening an editor first.
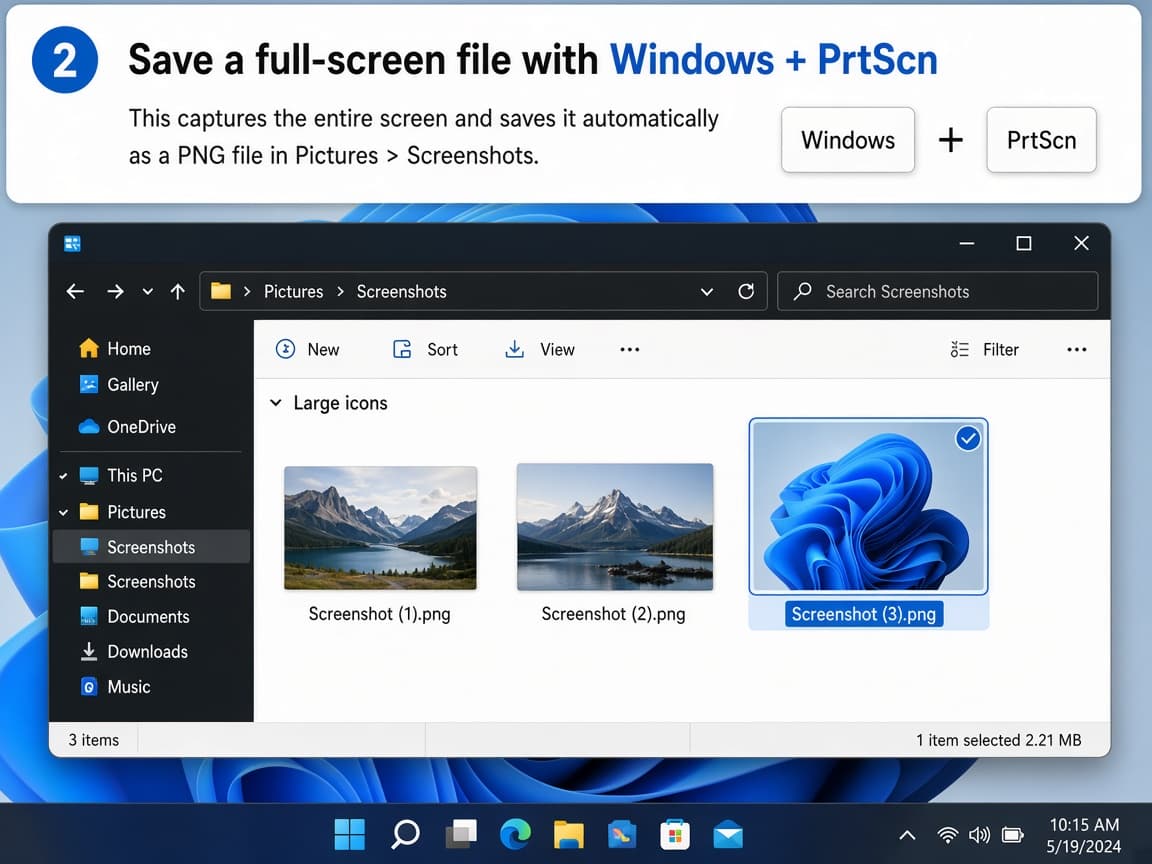
Windows + PrtScn saves under Pictures > Screenshots by default. Do this step in order
2a
Press Windows logo key and PrtScn together
Hold the Windows logo key and tap PrtScn (sometimes labeled PrtSc or Print Screen). The screen may dim briefly. That is the capture.
2b
Open Pictures, then Screenshots
Open File Explorer. Go to This PC > Pictures > Screenshots. If OneDrive redirects Pictures, look under OneDrive > Pictures > Screenshots instead.
2c
Sort by Date modified to find the newest file
Right-click empty space in the folder, choose Sort by > Date modified. Open the newest PNG to confirm the capture looks right.
2d
Know that PrtScn alone may open snipping now
On many Windows 11 PCs, pressing PrtScn by itself opens the snipping overlay. You can change that under Settings > Accessibility > Keyboard (or Keyboard settings on some builds) with the Print Screen toggle for screen snipping.
Step 03
Capture only the active window
Window capture keeps chat lists and other apps out of the image when one dialog is all you need.
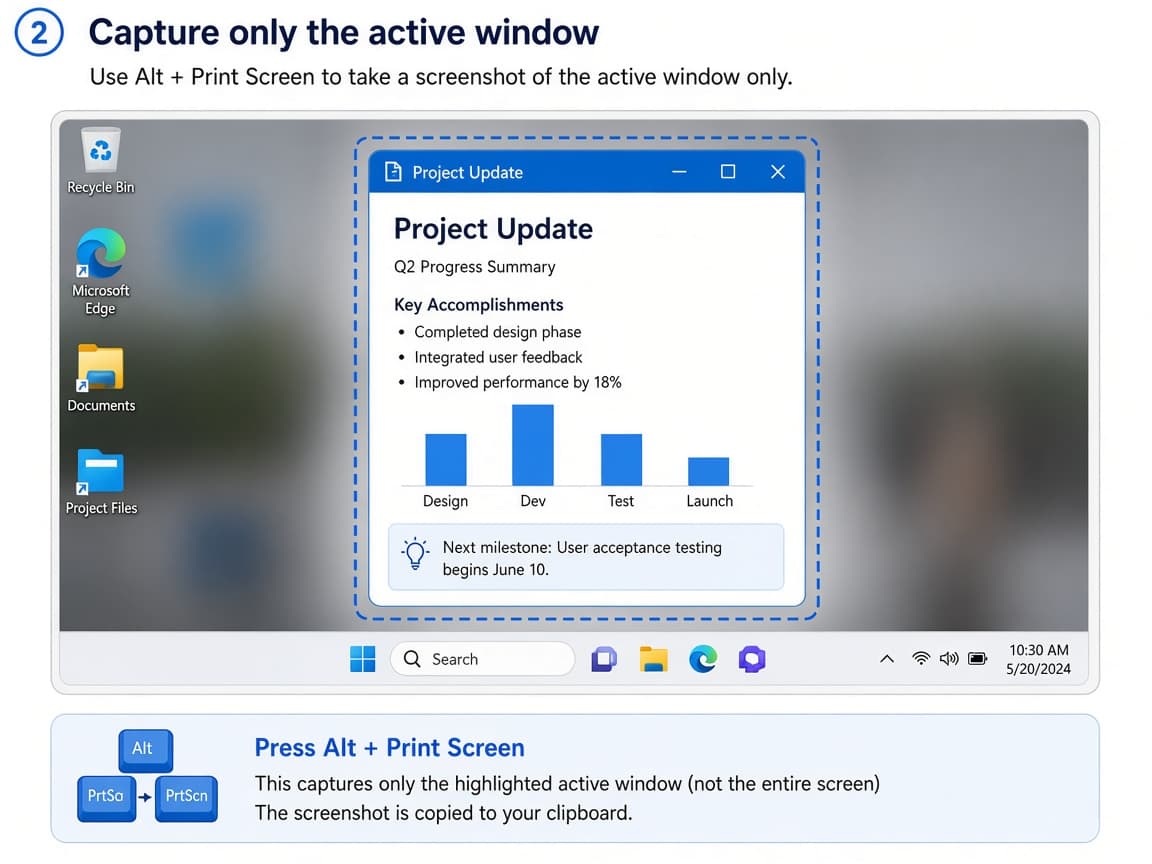
Alt + PrtScn copies the focused window to the clipboard. Do this step in order
3a
Click the window you want so it is active
Bring the app to the front and click inside it. The title bar should show it is focused. Menus and dialogs should be open before you press keys if those are what you need to show.
3b
Press Alt and PrtScn together
Hold Alt and tap PrtScn. Windows copies that window to the clipboard. There is usually no auto-saved file for this shortcut alone.
3c
Paste into an editor or document to keep a copy
Open Paint, Photos or a Word doc and press Ctrl + V, then save if you need a permanent file. Skipping this step is the usual reason people think the window capture failed.
Step 04
Mark up, save and check privacy
A short edit pass makes screenshots clearer and safer to share.
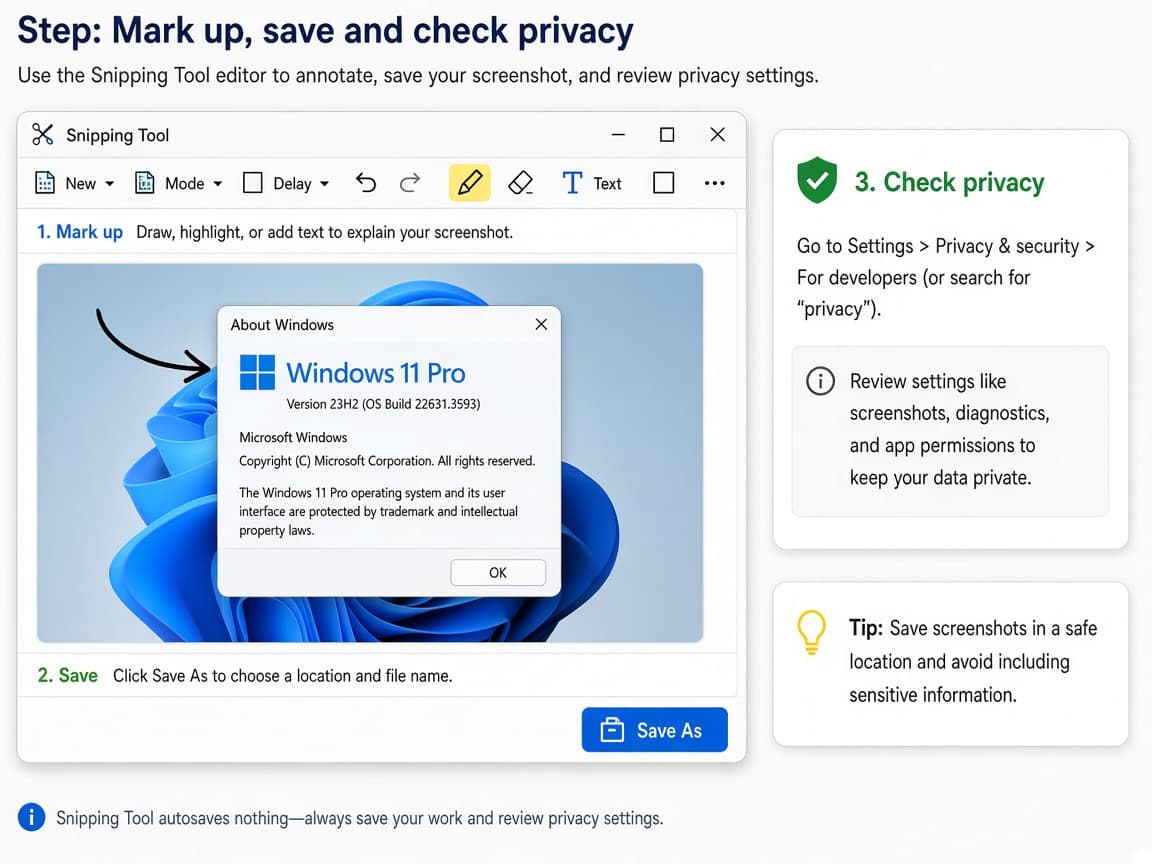
Open the capture from the notification when you need arrows or a quick crop. Do this step in order
4a
Open the capture from the toast notification
Click the screenshot notification while it is visible. Snipping Tool opens with pens, highlighter and crop tools. Save with Ctrl + S to a folder you will remember.
4b
Add one clear callout, not a cluttered scribble
Draw a single arrow or box around the control you mean. Keep labels short. Over-marking makes the screenshot harder to read on a phone.
4c
Scan for private data before you send
Look for email addresses, account numbers, notification previews and passwords in visible fields. Crop them out or shoot again with those windows closed.
4d
Use Snipping Tool from Start when you want delay or video later
Search Start for Snipping Tool to open the full app. You can set a short delay before a snip. On current Windows 11 builds you can also record a video snip with Windows + Shift + R. That is separate from still screenshots.
Done when
- Windows + Shift + S tried once
- Windows + PrtScn full-screen file found
- Alt + PrtScn window capture pasted once
- Pictures > Screenshots folder confirmed
- Notification opened for markup or save at least once
Eagle Frame’s takeaway: use Windows + Shift + S when you need a precise snip, Windows + PrtScn when you want a full-screen file saved for you and Alt + PrtScn for the active window on the clipboard. Click the notification to edit and save, then check Pictures > Screenshots before you assume the capture disappeared.