
How to tie a necktie (simple four-in-hand)
Learn the classic four-in-hand knot in four clear steps: drape the tie, wrap the wide end, pull through the loop and tighten for a neat everyday finish.
The four-in-hand is the knot most people mean when they say they can tie a necktie. It is slightly asymmetrical, slim enough for everyday shirts and fast once your hands learn the path. You do not need a Windsor for school photos, office days or most weddings. You need a clean collar, a decent mirror and a few minutes of practice.
Start with a standard necktie and a collared shirt buttoned to the top. The wide end does almost all the work. The narrow end hangs still as a guide for length. When you finish, the tip of the wide end should reach about the middle of your belt buckle. If it sits too high or too low, undo the knot and shift the starting lengths rather than yanking harder.
Use a mirror and stand with your chin slightly tucked so you can see the knot form under your own collar. Dim light and a phone selfie held too close make small mistakes look bigger than they are. Practice once with an old tie before you rush out the door in your best one.
This guide covers only the four-in-hand. Half-Windsor and full Windsor use more wraps and make a wider triangle. Learn those later if your collar spread or dress code asks for them. For most collars the four-in-hand is enough.
Step-by-step guide
Time: 5 to 10 minutes the first time; under 2 minutes with practice
What you need
- Necktie (standard length for adults)
- Collared shirt buttoned to the top
- Mirror at chest height
- Optional: second practice tie
Before you start
- Do not yank the narrow end through a finished knot. That stretches the lining and warps the shape.
- If the tip lands far above or below the belt, restart with different starting lengths instead of forcing the knot.
- Silk and delicate ties snag on rough fingernails and sharp collar stays. Handle gently.
Step 01
Drape the tie and set the starting lengths
Raise the collar, hang the tie around your neck and decide which side is the wide working end. Length now decides length at the end.

Start with the wide end clearly longer. That length becomes your finished tip. Do this step in order
1a
Button the shirt and flip the collar up
Fasten the top button so the collar sits closed. Flip both collar points up so you can see the knot form against the neckband. Smooth the placket so the tie hangs flat.
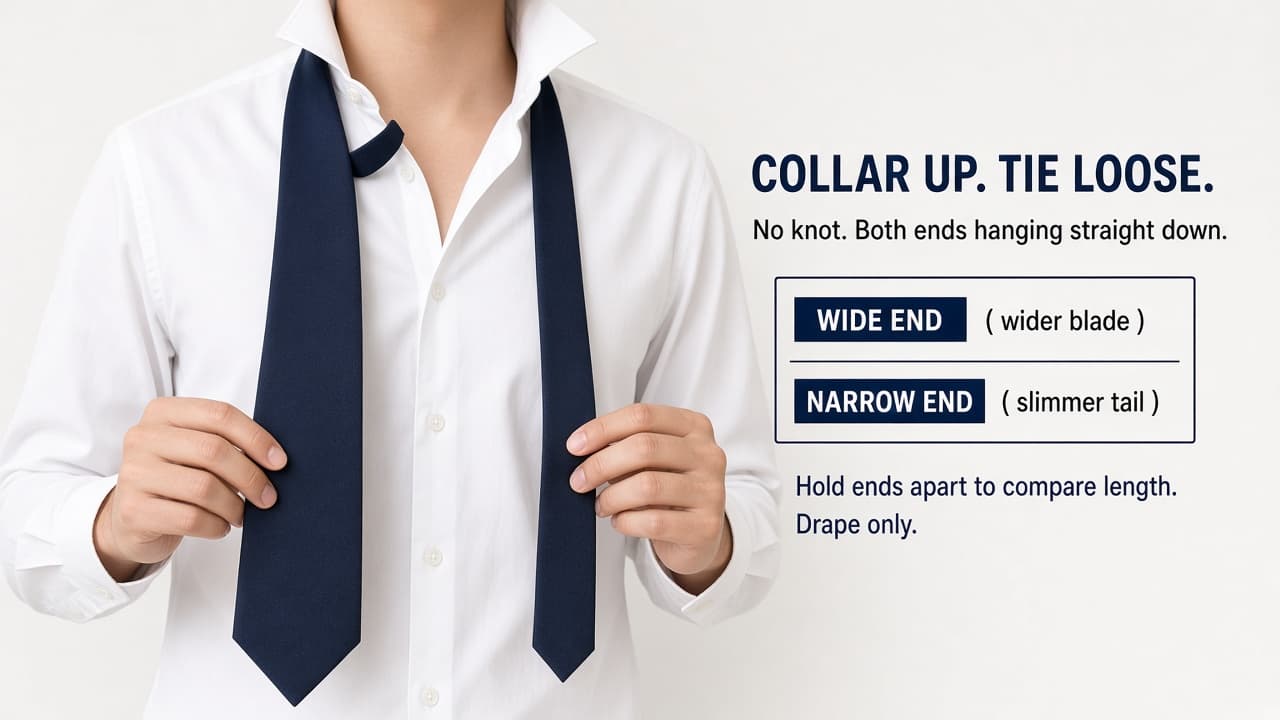
A raised collar gives your hands room and a clear view of the knot. 1b
Hang the wide end on your dominant side
Place the tie around your neck with the seam facing your shirt. Put the wide end on your right if you are right-handed (swap if that feels awkward). The narrow end hangs on the other side.
1c
Drop the wide tip to mid-thigh as a starting rule
Let the wide end hang roughly to mid-thigh while the narrow end sits higher near the navel. Exact inches vary by height and tie length. You will fine-tune after one practice knot.
1d
Check the mirror before the first wrap
Look straight on. Both ends should hang smooth with no twist. If the tie is rotated, straighten it now. Twists locked into a knot look messy and feel thick.
Step 02
Cross the wide end and wrap across the front
This is the classic four-in-hand motion: cross, wrap once horizontally, then prepare to go up behind the knot.
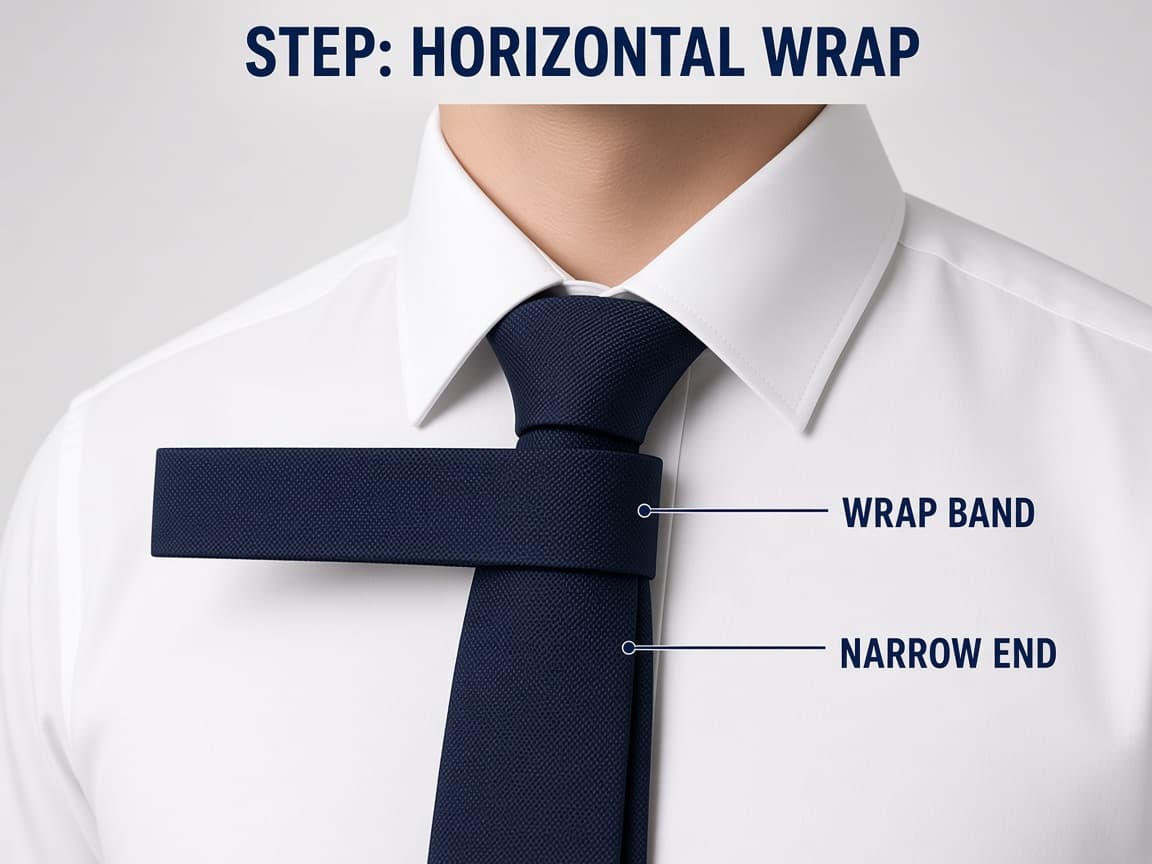
Cross wide over narrow, then wrap once across the front to build the knot body. Do this step in order
2a
Cross wide over narrow near the collar
Bring the wide end across the narrow end so they cross just below your throat. Hold the crossing point lightly with your non-dominant hand. That pinch becomes the center of the knot.
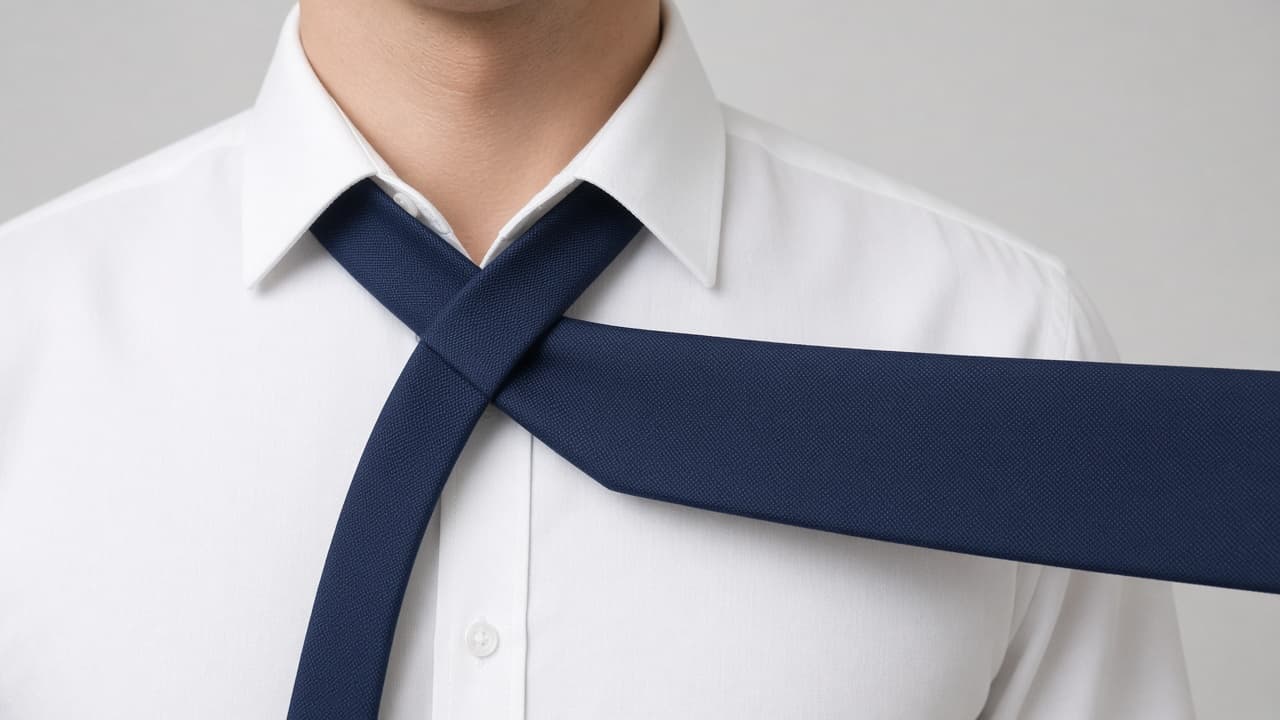
The cross sits high under the collar, not halfway down the chest. 2b
Wrap the wide end horizontally across the front
Take the wide end around the front of the narrow end from your dominant side toward the other side. Keep the wrap snug but not crushing. One clean horizontal pass is enough for a four-in-hand.
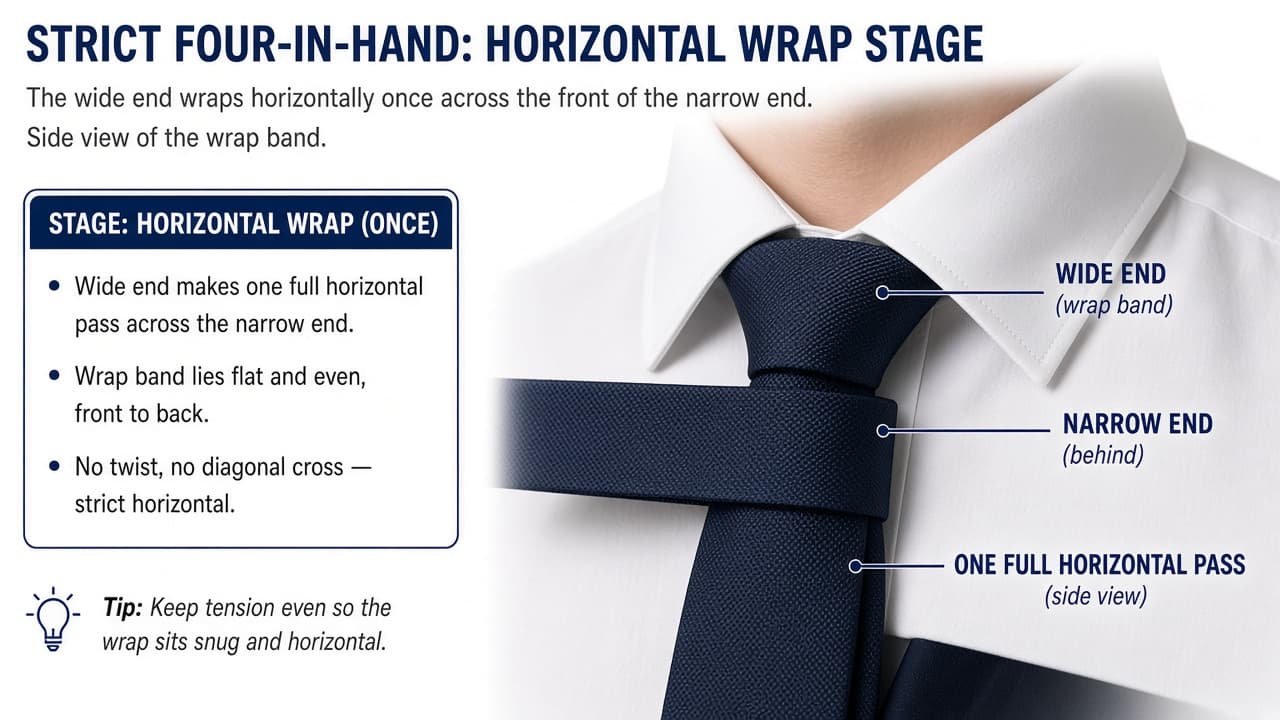
One front wrap builds the slim four-in-hand shape. 2c
Keep the narrow end straight and still
Do not let the narrow end swing or twist while you wrap. Use your holding hand to keep it centered on your shirt placket. The narrow end is a post. The wide end is the rope.
2d
Pause with the wide end ready to go behind
After the front wrap, the wide end should hang toward your non-dominant side, ready to travel up behind the knot. If the front looks loose and baggy, tighten the wrap slightly before the next step.
Step 03
Loop up behind the knot and down through the front
Send the wide end up through the neck loop, then down through the front pass you just made. That creates the familiar necktie front.
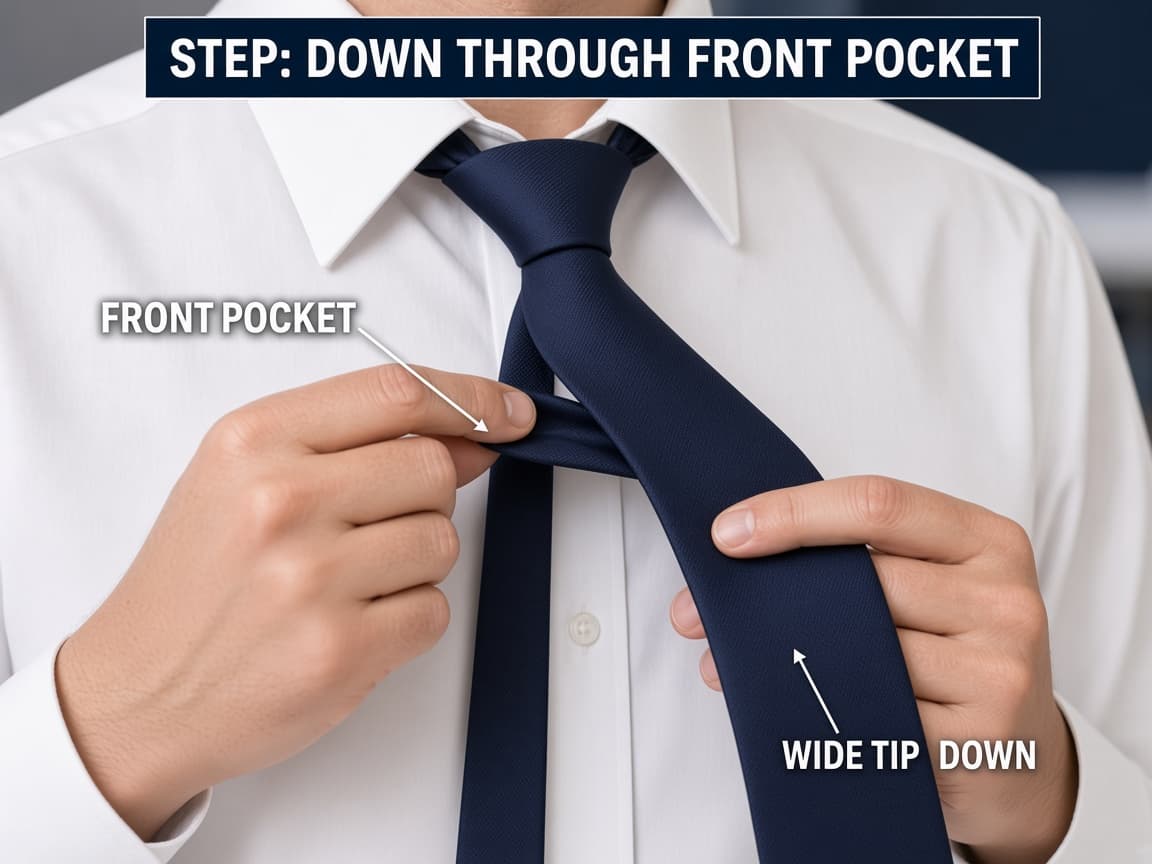
Feed the wide tip down through the front pocket to complete the four-in-hand shape. Do this step in order
3a
Bring the wide end up behind the knot
From the side where the wrap finished, push the wide end upward through the V of fabric behind the knot (between the tie and your collar). Pull it through until you have enough length to work with.
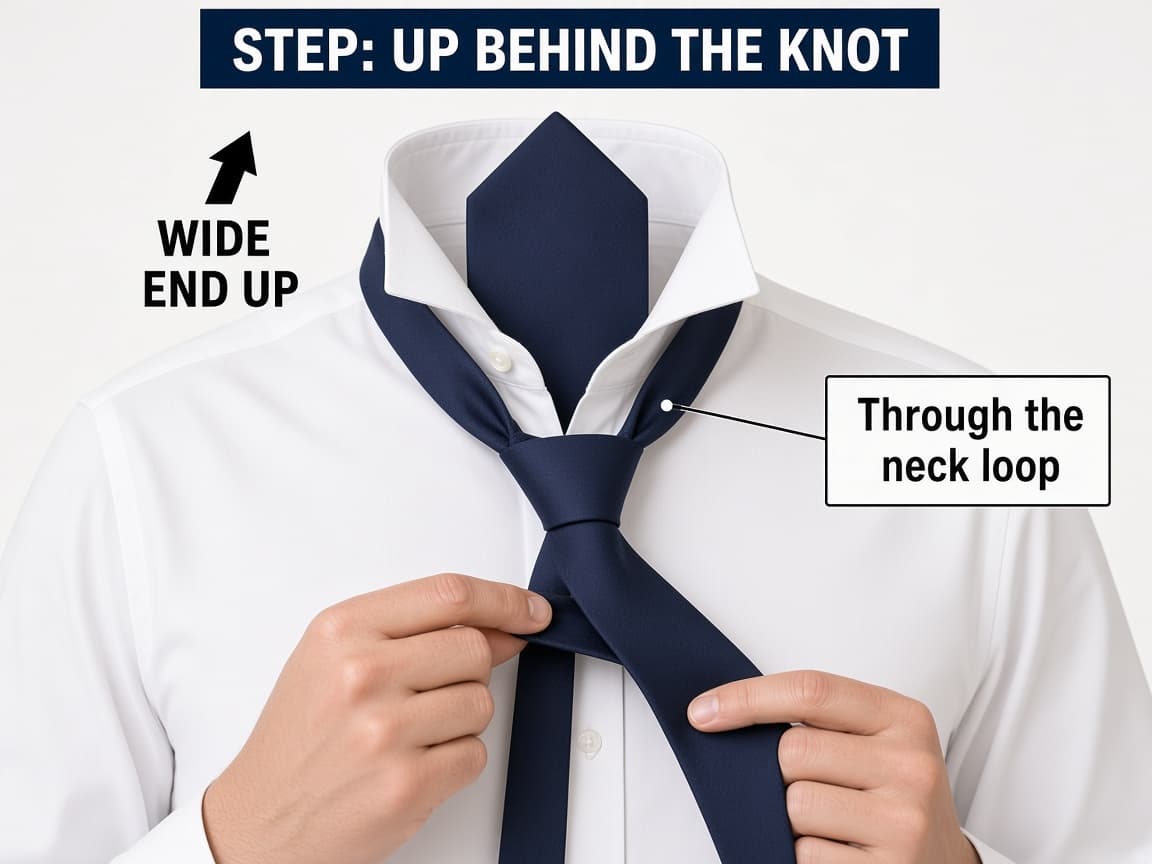
The wide end rises behind the knot before it drops through the front. 3b
Find the front pocket created by the wrap
Look at the horizontal wrap on the front of the knot. There is a small opening or “pocket” facing you. Hold that pocket open with a finger if you need to see it clearly.
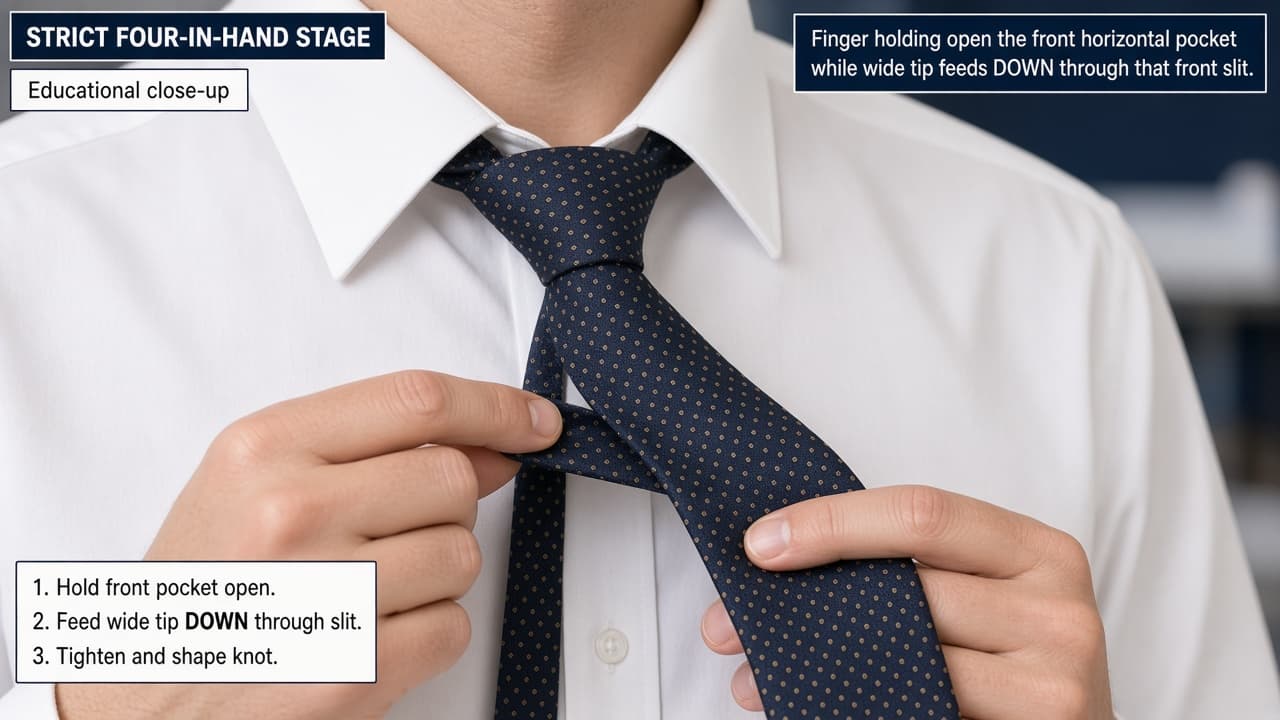
The front pocket is where the wide end will slide down to finish. 3c
Pass the wide tip down through the front pocket
Point the wide tip downward and feed it through that front opening. Pull gently until the knot starts to form. Do not yank the entire length through in one hard tug.
3d
Confirm both ends are free and untwisted
The wide end should hang in front. The narrow end should hang behind it through the keeper loop later. Check for twists in either blade before you tighten.
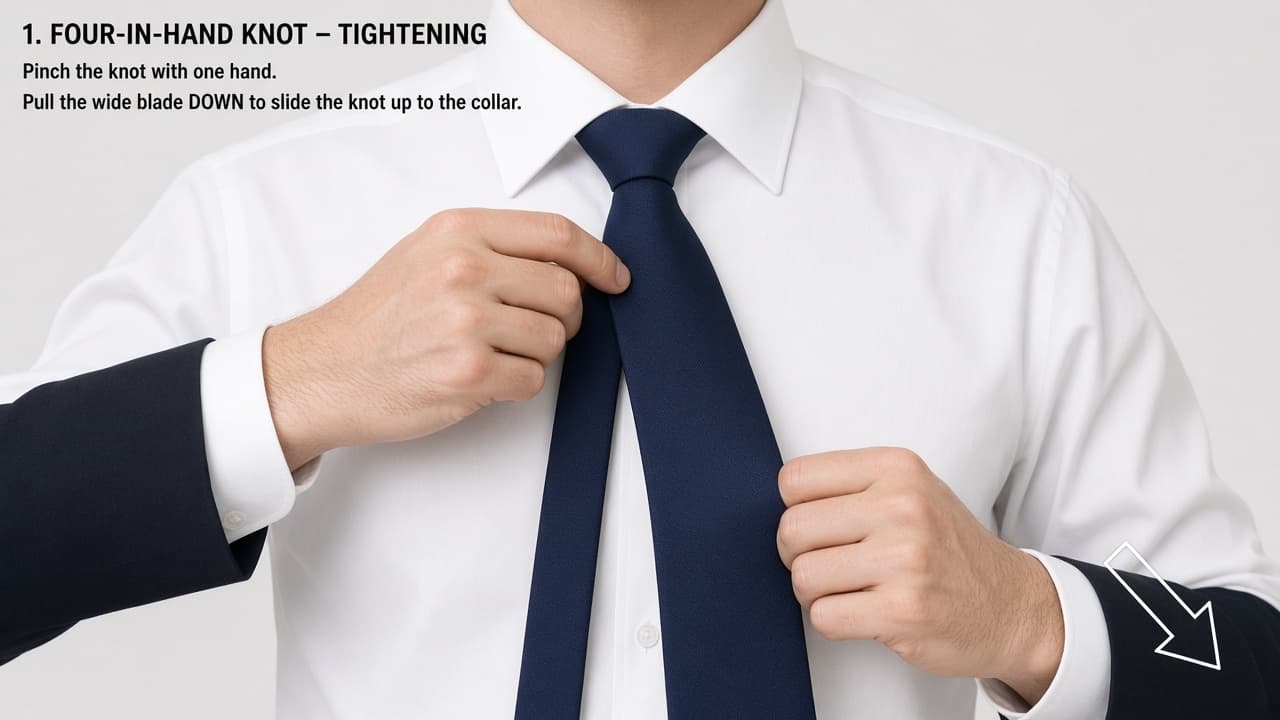
Straight blades now mean less fuss when you tighten.
Step 04
Tighten, dimple and set the collar
Slide the knot up, shape a soft dimple under it and fold the collar down. Aim the tip at your belt buckle.

Pinch the knot, pull the wide end to tighten, then fold the collar down. Do this step in order
4a
Hold the knot and pull the wide end downward
Pinch the knot with one hand. Pull the wide end down with the other so the knot slides snug toward your collar. Alternate small pulls on the wide end and gentle upward slides of the knot until it sits under the collar band.
Tighten with the wide end. The narrow end stays as the anchor. 4b
Press a soft dimple under the knot
With thumb and finger, pinch a shallow vertical fold in the wide blade just below the knot. That dimple helps the tie hang with a clean front. Do not crease it into a hard fold.
4c
Check tip length against the belt
The wide tip should land near the middle of your belt buckle. Too short: untie and start with more wide-end length. Too long: start with less. Sliding the knot alone cannot fix a big length error.

Belt-buckle length is the everyday target for a finished tip. 4d
Fold the collar down and center the knot
Fold both collar points down over the knot. Center the knot on your shirt placket. Slip the narrow end through the label keeper on the back of the wide blade if your tie has one. Common mistake: leaving the collar up and walking out with a perfect knot nobody can see properly.
Done when
- Collar up and shirt buttoned
- Wide end longer than narrow end at the start
- Front wrap and loop completed
- Wide tip near the belt buckle
- Knot centered with a soft dimple
Eagle Frame’s takeaway: drape with the wide end longer, wrap across the front, loop up behind the knot and slide down through the front pass. Tighten by pulling the wide end while you pinch the knot, then dimple and straighten. Practice twice at home and the morning knot stops being a scramble.